This recipe has been updated and moved to my new blog.
You can find it here: Molasses Spice Bars on The Creekside Cook
This recipe has been updated and moved to my new blog.
You can find it here: Molasses Spice Bars on The Creekside Cook
 You just never know what we are going to take it into our heads to do around here. Last year we started an orchard – a small one, but an orchard nonetheless. We also got chickens again, after a hiatus of about 10 years. And Larry started an asparagus bed, which is making us all itchy-fingered, because we want to eat those little spears poking up from the soil now, but in order to have good strong roots for the next 20 or 30 years, we have to keep our mitts off it this spring. Last fall, Larry increased the size of the veggie garden by at least a third, which means we are growing a garden at least twice the size of the square footage of our house! Sounds a little crazy, but we are inching closer all the time, to being able to feed ourselves from our two acres of land. We don’t necessarily have aspirations of giving up grocery shopping entirely, but when the zombie apocalypse comes, we will be better prepared than most.
So what is the next logical step in this progression? A greenhouse! I have wanted a greenhouse for years – ever since I worked in one every spring for a dozen years or so. Looking at kits wasn’t encouraging. You have ugly little metal frame and sheet plastic models if you don’t have much money, and gorgeous $10,000 cedar framed, double paned models if you have plenty of money. The $10,000 ones were out as far as we were concerned and the cheap ones aren’t durable enough to be worthwhile. There are some kits in the several-thousand dollar range too, but even those are a bit out of reach for us, in that it would take years to work off that cost in the savings we might see from using the greenhouse. There are hoop houses made from PVC and sheet plastic that can be put together fairly cheaply, but honestly, I don’t want to look at one of them all the time in what is essentially my front yard. It wasn’t until I saw some examples of greenhouses, made from old windows and doors on Pinterest, that the idea we could build a very nice greenhouse ourselves really took hold. And when I mentioned on Facebook that we were starting this project, everyone was asking me to make sure I document it so that others can see what we are doing. Therefore, today, we have part 1 of the process.
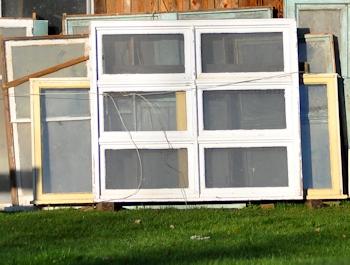
The very first step was finding materials – in our case, old, wooden framed windows. I looked on craigslist.org to see if anyone in the area had any they wanted to sell. What I found was even better – ads for free windows! A lot of times, when people have new, more efficient windows installed, they find that getting rid of the old windows can be expensive. So, instead they set them in the back of the barn, or in a corner of the cellar, with plans to do something about getting rid of them eventually. So – I put this ad up on the craigslist for the nearest big town, which happens to be Ithaca NY:
If you have wood frame/old windows laying around, we will be glad to take them off your hands. We are building a greenhouse on the cheap, so we aren’t looking to spend much – spending nothing is even better. If you have windows you hate to see end up in a landfill, send us an email, and maybe they can end up in our greenhouse instead.
In, literally, hours, we had enough replies to keep Larry busy picking up old windows for the next week. Some are in better shape than others, and they are in every imaginable size and configuration, but we think we have enough for the whole project. How much did we have to spend? Not one penny. Maybe $30 on gas for the truck all together.
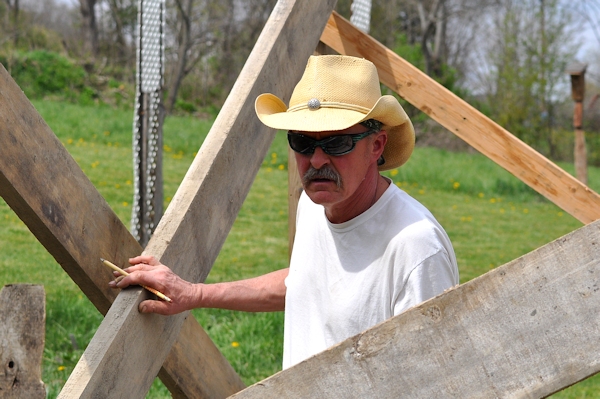
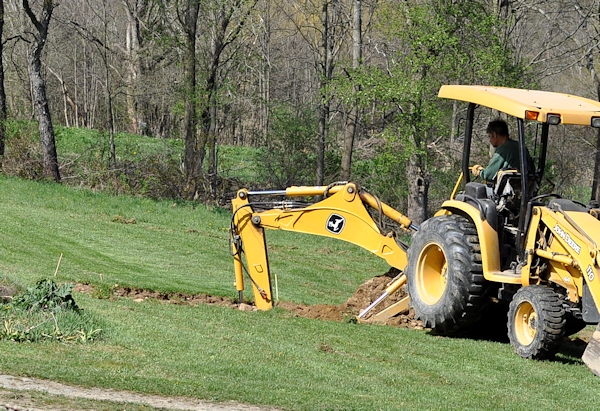
In detailing this project, it would be unfair of me to not point out some significant advantages that we have, right from the start. Number one would have to be Larry himself. He is a professional carpenter, with nearly 40 years of experience. He knows how to put a building together so that it will still be there years from now, and he knows how to do it without spending a lot of money. That garage those windows are leaning against in the photo above was built almost entirely from salvaged materials. He is also very fond of straw cowboy hats, and was trying to tell me something “so why are you taking my picture???”. [whatever, dude] Another advantage is that we live next door to Larry’s family farm, which is now owned by his siblings, and possesses some very handy toys like a backhoe and a skidsteer, for digging a foundation, and then filling it back up with stone and gravel for a passive solar heating system, to save on fuel costs, should we decide to heat this thing in the cold months. Oh yeah – we also have this dandy little run-off creek running right through our land, and because of last years flooding, it is jam-packed with tons of loose gravel.
 You can see it is actually beginning to resemble an actual structure – out of our imaginations and into reality.
 So far we have an 8 by 10 foot hole, 2 feet deep, filled with creek rock and gravel. The corner posts are 5×5 treated lumber, purchased used from a local fence company, for about $12 each. All of the angled boards are just to hold the posts straight – they will be coming out eventually. There is also a run of 2 x 10′ treated lumber boards around the bottom of the posts. Total expenditures so far are just under $100, all of it for lumber and some fuel for the machinery. We have a budget of staying under $500 for this project, which we hope is being pretty liberal. Next up – rafters for the roof.
This post has been updated and moved to my new blog.
You can find it here: Kale & Spicy Sausage Soup on The Creekside Cook
This post has been updated and moved to my new blog.
it can be found here: Spring Wake up Tonic for Daylilies
This recipe has been updated and moved to my new blog!
You can find it here: Browned Butter Chocolate Chip Cookies on The Creekside Cook